JSON is one of the most commonly used data formats. You’ll most likely use JSON data regularly when you’re a developer. Depending on your use case, there are different kinds of tools to help you work with JSON data. This article discusses 4 different types of JSON tools and explains when to use them.
1. Use your own IDE
Perfect for: JSON configuration files.
Most IDE’s that developers use have excellent JSON support nowadays. IDE’s like Visual Studio Code and Webstorm come with code highlighting and can neatly format your JSON configuration file.
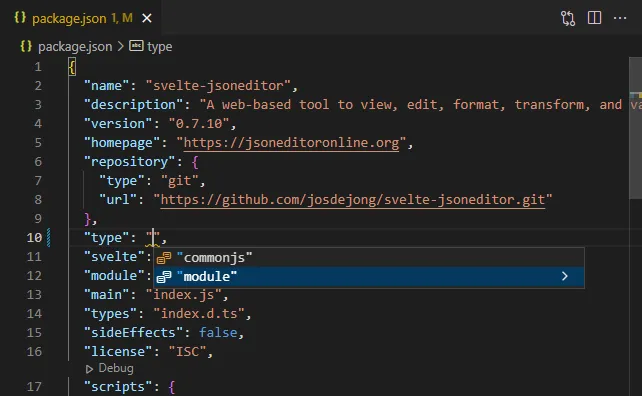
Code projects typically contain a couple of configuration files, often in JSON or a JSON dialect like Yaml or JSON5. These configuration files are perfect candidates to edit in your IDE itself. Most web application projects for example contain a configuration file package.json for npm, and the IDE’s provide auto-completion and validation of these configuration files. This makes it easy to see what properties are available and what values are available.
Furthermore, when using git or another versioning system in your code project, you can also keep track of changes made in the configuration over time, and you can compare the current version against previous versions.
2. Use an online JSON Editor
Perfect for: inspecting, formatting, and querying JSON data on the fly.
As a developer you are often dealing with JSON data coming from a backend. That can be as a frontend or backend developer. In the frontend, you can see the JSON data that you received using Developer Tools. And when purely working on a backend you are probably using a REST client like Postman or Insomnia to fetch data. With these applications you can view your data. But whilst developing, you often have to do some processing on the data, like sorting and filtering some items from a received list. To do that, you can copy and paste the JSON data in an online JSON editor like JSON Editor Online.
There are quite some online JSON editors, so just pick your favorite. I mention JSON Editor Online here because this is the web application that I developed myself to - in the first place - serve my own needs, working as a developer with JSON data on a day-to-day basis for many years. Most editors offer basic editing and formatting of JSON data. You can use them as a JSON viewer or JSON formatter. JSON Editor Online offers that too, but also comes with powerful solutions for querying, transforming, comparing, and repairing your data.
With JSON Editor Online, you can use the Transform wizard to create a query on your data. In the following example, the data set UNECE’s Country Overview is loaded in the editor, and we’re filtering on the country “Netherlands”, sorting by year, and then picking the fields we’re interested in from the data:

Before I developed this Transform modal to query your data, I mostly used command line tools or MongoDB to query my JSON data. Both of these categories are discussed in the following sections. The difficulty I have with for example command line tools is that I didn’t use them enough to be able to learn and remember their syntax, so every time I did use them I had to do quite some googling and trial and error to figure out the right way to describe what I wanted to query.
For me, a visual editor where I can build a query and directly see a preview of the result saves me a lot of time (and frustration), so that’s what I created. I’ve been working a lot with large amounts of JSON data, and therefore I’ve built an editor which can smoothly handle JSON documents up to 500 MB. Also, I found most of the querying languages limiting in one way or another. How do I count the number of unique occurrences of a value using JMESPath for example? I wanted more freedom, and as a web developer, just being able to use JavaScript in combination with Lodash gives me all the flexibility I need to write the query I need in just a few lines. So that’s what I implemented for the editor.
What querying language you prefer can be personal taste or bound to what you use in other places of your development environment. Therefore, the editor allows you to select other querying languages too. At the moment of writing you can switch to JMESPath if you prefer that, and support for other querying languages may follow.
3. Use a command line tool
Perfect for: repeated, automated processing of JSON data
Common line tools shine in an environment where you repeatedly need to process the same kind of JSON data, or in an environment like a remote server where you cannot easily extract the data in an external tool like an online JSON editor discussed in the previous section.
We’ll discuss two types of command line scripts: shell scripts and node.js scripts.
3.1 Shell Scripting
I’ve regularly used tools like jq and jp (the latter using JMESPath) to process JSON data on the command line. I like using them to repeatedly process things like JSON logs on a server, or JSON data exported from a database on a server. I also used these tools in combination with Curl to download data from a server, and then do some querying on the data afterward before saving the filtered files on disk. These tools are highly performant and can process large JSON files with a breeze.
A command line tool like jp works as a pipeline: input, filter, output. Here a basic example from the library itself:
$ echo '{"foo": {"bar": ["a", "b", "c"]}}' | jp foo.bar[1]
"b"
You can save a script containing the queries and execute these repeatedly. You can use it in Linux shell scripts to automate processes. So for example, you can imagine that the UNECE’s Country Overview data set used in the previous section gets a yearly update. Using sh, curl and jp, we can write a script which can download and process the data in one go:
#!/usr/bin/env sh
# filename: download_and_process.sh
# to execute:
#   ./download_and_process.sh

URL='https://api.data.world/v0/datasets/badosa/uneces-country-overview'
AUTH_TOKEN='*********************'
QUERY='[? Country == `"Netherlands"`] | sort_by(@, &Year) | [*].{Country: Country, Year: Year, "Total population": "Total population", "Total fertility rate": "Total fertility rate"}'
DATA_FILE='data/unece_country_overview.json'
OUTPUT_FILE='output/netherlands.json'

mkdir -p data
mkdir -p output

# download the data
curl --request GET \
 --url "$URL" \
 --header "Authorization: $AUTH_TOKEN" \
 --header 'Content-Type: application/json' |
 > $DATA_FILE
echo "Data written to $DATA_FILE"

# process the data
cat $DATA_FILE | jp "$QUERY" > $OUTPUT_FILE
echo "Processed output written to $OUTPUT_FILE"

# output the first couple of lines to see the results
echo 'Preview:'
head -16 $OUTPUT_FILE
echo '...'
Which will output:
$ ./download_and_process.sh
  % Total    % Received % Xferd  Average Speed   Time    Time     Time  Current
                                 Dload  Upload   Total   Spent    Left  Speed
100 3880k  100 3880k    0     0  2819k      0  0:00:01  0:00:01 --:--:-- 2822k
Data written to data/unece_country_overview.json
Processed output written to output/netherlands.json
Preview:
[
  {
    "Country": "Netherlands",
    "Total fertility rate": 1.72,
    "Total population": 15925512.5,
    "Year": "2000"
  },
  {
    "Country": "Netherlands",
    "Total fertility rate": 1.71,
    "Total population": 16046180,
    "Year": "2001"
  },
  {
    "Country": "Netherlands",
    "Total fertility rate": 1.73,
...
Now, I’m not a linux scripting guru and every time I write a script like this one, I need to do some googling for the exact syntax. And honestly, I’ve created the JMESPath query using the visual transform wizard of JSON Editor Online explained in the section above. That doesn’t need to be a problem, but if you’re not experienced it will take some time to write such a script.
3.2 Node.js scripting
If you’re familiar with JavaScript and node.js but not really a linux expert, you could write a Javascript file which does the same as the shell script:
// filename: download_and_process.mjs
// to execute:
//   node ./download_and_process.mjs

import { readFileSync, writeFileSync } from 'fs'
import { filter, orderBy, map } from 'lodash-es'
import mkdirp from 'mkdirp'
import fetch from 'node-fetch'

const URL = 'https://api.data.world/v0/datasets/badosa/uneces-country-overview'
const AUTH_TOKEN = '*********************'
const DATA_FILE = 'data/unece_country_overview.json'
const OUTPUT_FILE = 'output/netherlands.json'

// make directories for the data
mkdirp.sync('data')
mkdirp.sync('output')

// fetch the data
const data = await fetch(URL, {
  headers: {
    Authorization: AUTH_TOKEN,
    'Content-Type': 'application/json'
  }
}).json()
writeFileSync(DATA_FILE, JSON.stringify(data, null, 2))

// process the data
const processedData = query(data)
writeFileSync(OUTPUT_FILE, JSON.stringify(processedData, null, 2))
console.log('Processed data:')
console.log(processedData)

function query(data) {
  data = filter(data, (item) => item?.Country === 'Netherlands')
  data = orderBy(data, ['Year'], ['asc'])
  data = map(data, (item) => ({
    Country: item?.Country,
    Year: item?.Year,
    'Total population': item?.['Total population'],
    'Total fertility rate': item?.['Total fertility rate']
  }))
  return data
}
Both bash script as well as node.js scripts can be stored in a git project or anywhere, and can be executed as often as you want. The examples above show how to process a single file, but you can imagine that it is not that complicated to extend the script to process a list with files instead, or process the same url with different parameters.
4. Use a JSON based database
Perfect for: processing huge amounts of JSON data, and/or dynamic data that is already located in a JSON based database
Online JSON Editors and command line tools can process large JSON documents, but they do have limits. A more flexible solution to work with JSON data is putting the data in a database. I’ve used NoSQL databases intensively over the last 20+ years. I like the flexibility of them, and have worked for example with MongoDB and to a lesser extent with CouchDB. Both these databases store your data in a JSON format, and have powerful querying solutions to fetch and process your data. In this section we will focus on using MongoDB.
Whereas online JSON editors and command line tools often have a limitation in the size of the data they can handle, a database like MongoDB can handle terabytes of data. When working with such amounts of data, you can’t just download the data and do some fiddling with it on your own laptop for some analysis. It is simpler: you can just utilize the database itself. Be careful though when processing data in a production environment though, you may accidentally make changes in the data itself.
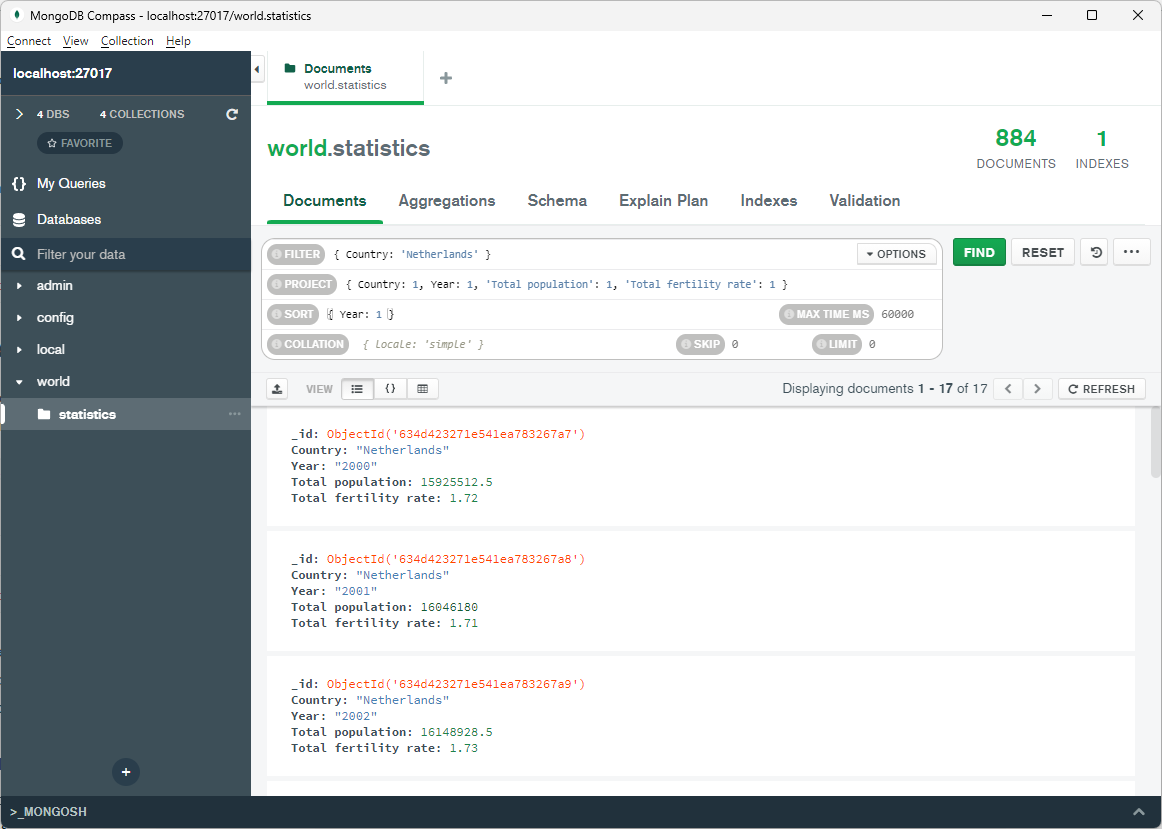
When working with MongoDB, you can use the command line, or you can install and use a graphical user interface like Mongo Compass or Studio 3T (formerly Robo 3T).
In Mongo Compass, you can create a new database and collection, and click “Add data”, “Import file” to import the JSON data that we used in previous examples from a file on disk:
Like with command line tools, there is a learning curve for MongoDB. MongoDB has extensive documentation including many examples though, and excellent user interfaces that will help you.
Conclusion on the 4 JSON tools categories
There are a lot of different tools to work with JSON data, each with their pros and cons. This article offers an overview of 4 different types of tools and explains how and when to use them. Depending on your use case, preference, and experience you can pick a solution that you like the most.